For a while now I’ve been curious about the application of multi-factor authentication for Linux console and SSH access. It’s a particularly challenging use-case, especially if you operate in an air-gapped configuration, and yet need to meet industry standards such as PCI’s Control 8.5.1, or NIST 800-53’s Control IA-2(1). Multi-factor is essentially a requirement to use at least two of the following identification types with authenticating users:
- Something you know (e.g., password or PIN)
- Something you have (e.g., software authenticator or hardware token)
- Something you are (e.g., biometric data)
Until now, I’ve not taken the opportunity to implement such a deployment to understand how it is configured and functions. There are several different documents available online, however, I was unable to find one that was holistic and in-depth, yet simple in explaining the process of using a Yubikey for both local (e.g., console) and remote (e.g., SSH) access on a Linux host. Thus, here’s my elementary take on it. As you begin, be aware, this is a great way to lock yourself out, so use caution to understand this and test it before you attempt to use it!
Remote – Yubikey with SSH (and certificates)
The easiest use-case is to implement a Yubikey to use an ed25519-sk certificate to accompany your FIDO/U2F device, aka. your YubiKey. This is easily generated using your local account and the below command.
ssh-keygen -t ed25519-skAs part of this generation process, you’ll need to touch the button on your key. As usual, you’ll end up with two files, one for your public key as well as your private key. You’ll want to copy the public key to your user account on the remote host.
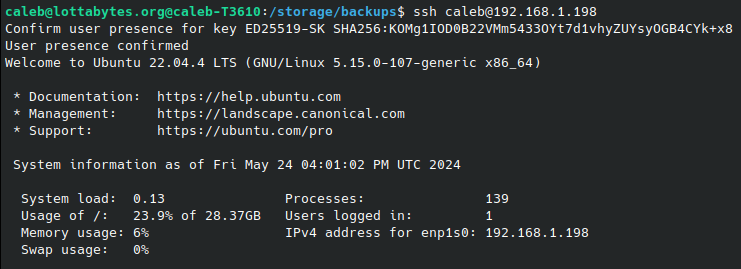
ssh-copy-id -i ~/.ssh/id_ed25519_sk.pub caleb@192.168.1.198In the enterprise, this is where things get interesting. As you’ll see later, we’re going to change the SSHD config to require this certificate (and associated Yubikey confirmation touch), as well as a password. This means that this step will no longer work, so you’ll have to setup a syncing process to pre-populate these public keys for every host and every user account. However, during this first login you can now see that not only does it succeed, but only required the certificate, not MFA as no password was required.
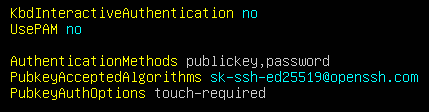
To fix that, we need to change our /etc/sshd/sshd_config with the below settings…
# Ensures that we require both factors, key and password
AuthenticationMethods publickey,password

# Ensures that a user cannot upload a non-FIDO key file
PubkeyAcceptedAlgorithms sk-ssh-ed25519@openssh.com

# Ensures that the FIDO signature is required
PubkeyAuthOptions touch-required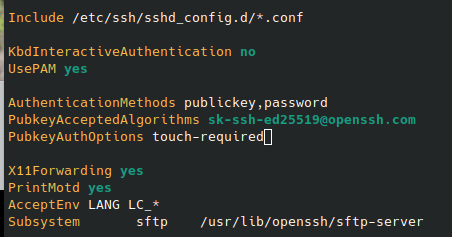
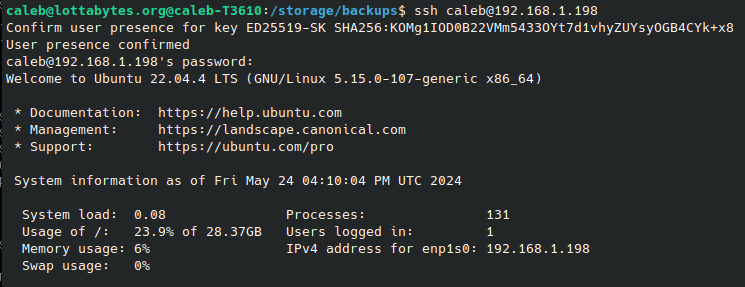
As you can see upon next login, you are prompted for the Yubikey touch, as well as the password. Congratulations, you’ve successfully implemented multi-factor using phishing-resistant FIDO authentication!
As a last step, let’s see what happens if I launch the connection without my Yubikey inserted.

As expected, the connection will not succeed!
Console – Yubikey with USB (in air-gapped, challenge-response mode)
Accomplishing a console connection has a similar challenge to the SSH certificate, in that you’ll need to store the individual challenge files in a directory for the PAM module to access. For this example, I’m going to create /var/yubico/ and change it so that all users have write and execute permissions (to upload their challenge files).
sudo mkdir /var/yubico
sudo chmod 0773 /var/yubico
In a production environment however, these should be generated out-of-band when the Yubikey is provisioned for a user, and placed in a protected location, without direct user access. Speaking of provisioning, we’ll do that now, by configuring our key to be in Challenge-Response Mode, using OTP in Configuration Slot 2. You can use the Yubikey Manager download, or for my Ubuntu box it was available as the yubikey-manager package.
# Install the Yubikey Manager
sudo apt install yubikey-manager

# Configure your key for Challenge-Response OTP, using Slot 2, requiring touch (-t) and generating (-g) the secret.  Make sure to save your secret.
ykman otp chalresp 2 -t -g
Next, we’ll install the PAM module (unconfigured), and create our initial challenge file for this user and this Yubikey.
# Install the PAM module
sudo apt-get install libpam-yubico

# Create the challenge file, storing it in /var/yubico.
ykpamcfg -2 -v -p /var/yubico/
Note: when it is sending the HMAC challenge, you need to touch your button on the Yubikey.

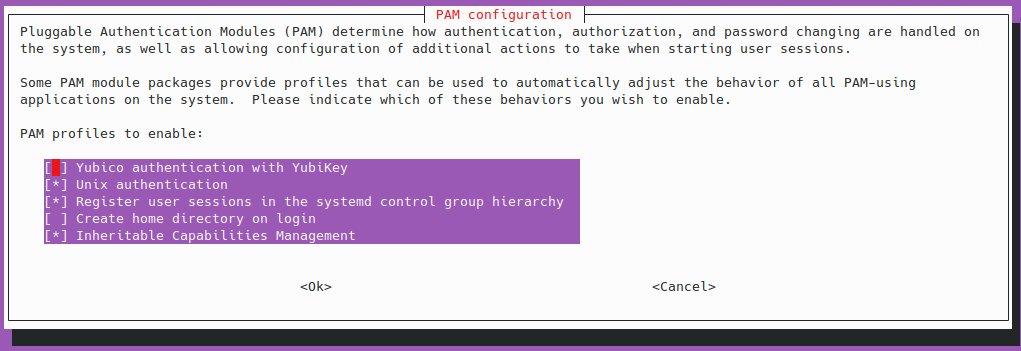
Next, we’ll change the PAM configuration to require our Yubikey for user authentication. Detailed documentation is available in the pam_yubico man page (online version).
sudo dpkg-reconfigure libpam-yubicoAt this point you’ll want to update the below (which is then stored in the /etc/pam.d/common-auth).
mode=challenge-response chalresp_path=/var/yubico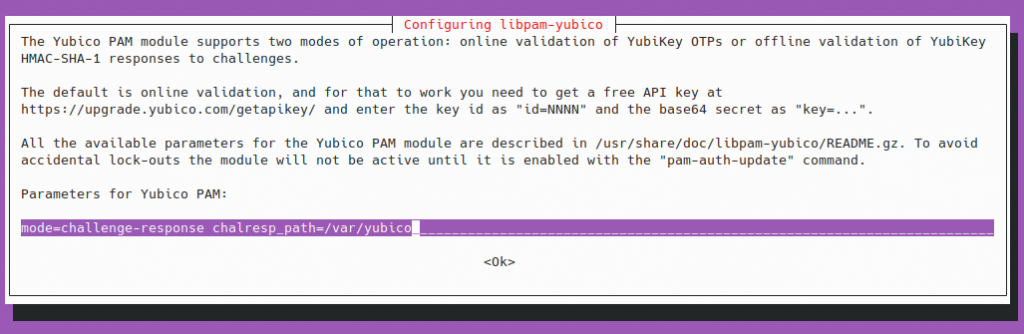
Next, select the “Yubico authentication with Yubikey” option to enforce MFA.
Now, you should be able to login with your Yubikey and password from the console. After typing in your user name for console login, you’ll not be visually prompted on the console output to do anything, however, your Yubikey will be blinking. Once you touch the button, the normal prompt will appear for the user’s password. Completion of these steps will now allow successful login.
Oh, no, SSH is now broken!
From my limited experience, this is where things start to get messy, and where you should consider if using PAM on the console is a strict requirement, or, if you can secure your console via an alternative mechanism, such as MFA to access the console screen (e.g., AWS Console). If you know of a better way to accomplish this, please send me a note! At this point you’ll notice that if you attempt to SSH (which previously worked), you will now no longer be able to login. Instead you will be prompted that your password is incorrect. This is because the PAM common-auth module is attempting to use the Yubikey, which of course isn’t accessible. You can do USB passthrough via SPICE (or similar), but at that point, why bother with SSH in the first place?
I’ve tried various settings and options, from configuring the pam_u2f with a local authfile, to changing the AuthenticationMethods in sshd_config, but, thus far have not found a good working solution that allows this to work as-is with PAM. There is a workaround, which is to disable the use of PAM by setting UsePAM to no.
This workaround however does come with an implication, PAM is still used for certain operations, such as sudo, which means that as-is, your user will be prohibited from performing sudo operations by the same incorrect password error.

This again is easily handled (but has associated implications) by removing the password requirement to run the sudo command for certain users. In this case, by having an admin group that I’m a member of.
%admin ALL=(ALL) NOPASSWD:ALLI hope that this is useful to someone else out there in exploring MFA for both use cases together. Individually, they are rather straight-forward, however, combined they have proved, at least to me, to be a bit more challenging.