For those of you who haven’t already heard of Nextcloud, I highly recommend that you take a look at their mature open source solutions for secure and sovereign data collaboration. For those of you who are already using it, but want to connect your server to a Samba-based AD, you can find the official documentation here. However, if you’re like me, you’ll very quickly run into an issue, and your first Google search will likely turn up the easy answer, that if you follow, will open your environment to a known relay attack and associated CVE.
So, instead of weakening your security, I’d like to walk you through doing this the correct way which isn’t immediately apparent from the official documentation.
Once you have followed the official documentation to install the AD/LDAP Plugin, you’ll need to specify the LDAP server. If you simply enter your server, the port will be automatically detected (389), however any attempt to validate the Base DN will fail. You will see errors in you NextCloud Logs similar to the below.
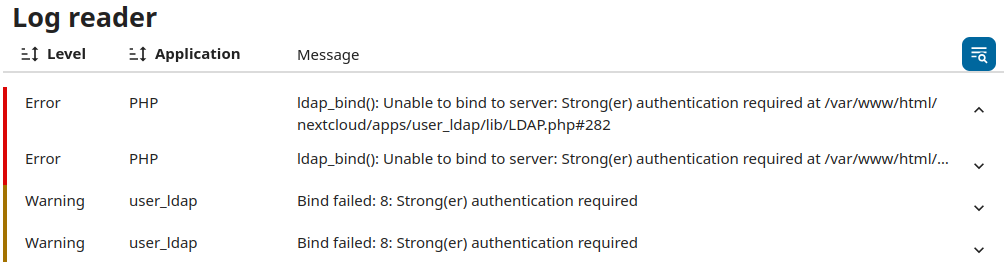
Changing the connection string to ldaps://<server> will cause these errors to vanish, but a new error will arise, Can’t contact LDAP Server (-1), but without further details. As you can see below, these errors can be reproduced by the ldapsearch tool in three different modes:
- Plain Bind (Port 389) = Stronger authentication required (8)
- StartTLS (389) = Connect error (-11)
- LDAPS (636) = Can’t contact LDAP server (-1)

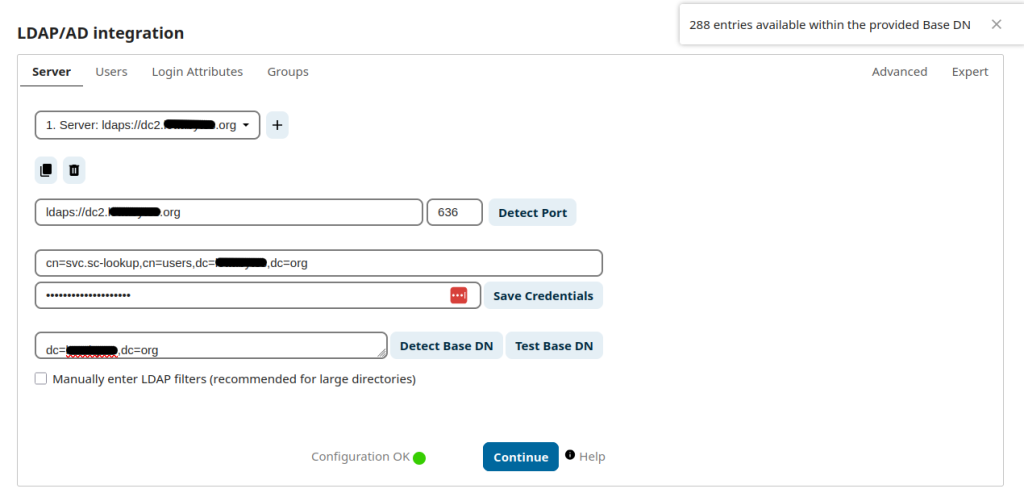
Simply put, you need to set your connection server to ldaps://<server> and Port 636, but it won’t work until you resolve the currently-underlying issue, which is likely related to the Samba AD Server having an untrusted certificate, as well as an untrusted CA certificate. You can validate this by running the below command from your Nextcloud server and observing certificate validation errors.
openssl s_client -connect <SERVER>:636 -showcerts -CAfile /etc/ssl/certs/ca-certificates.crtOk, so now how do we fix these errors:
- Copy the Root CA Certificate from your Samba DC to your Nextcloud server, making sure during this process to change the file extension to be .crt.
- CA Source = (Samba Server) /usr/local/samba/private/tls/ca.pem
- Destination = (Nextcloud Server) /usr/local/share/ca-certificates/ca.crt
- Server Certificate Source = (Samba Server) /usr/local/samba/private/tls/cert.pem
- Destination = (Nextcloud Server) /usr/local/share/ca-certificates/cert.crt
- CA Source = (Samba Server) /usr/local/samba/private/tls/ca.pem
Once the files have been copied and renamed, you’ll need to execute the below command to insert them into the local machine’s trust store. This process will need to be repeated whenever your Samba Server’s certificates are regenerated.
sudo update-ca-certificatesThis should return a response similar to the one below, but stating that 2 new certificates were added.

Once completed, you should be able to run the same commands that you originally ran, but instead of receiving an error, you should receive objects from your domain.
ldapsearch -x -D "cn=<EXAMPLE_USER>,cn=users,dc=<DOMAIN>,dc=org" -w "<PASSWORD" -H ldaps://<DOMAIN_CONTROLLER> -b "dc=<BASE_DN_DOMAIN>,dc=org" | lessThe behavior should also be shown in the NextCloud LDAP/AD configuration, with a successful test of the Base DN now that LDAPS is working with trusted certificates.
Cybersecurity, otherwise known as information assurance, is really just a maturity in your level of operations that takes into account that bad things will happen to your environment. Either with a malicious origin, or accidental, you should always be taking that into account. This is an example of the easy way (opening up a serious vulnerability), or a more correct way that takes more effort, but closes a serious gap in the security of your entire domain.